
DOWNLOAD THE APP


Customer Services
Copyright © 2025 Desertcart Holdings Limited
DOWNLOAD THE APP


🏠 Elevate your space with smart, silent shade control — because your windows deserve the upgrade!
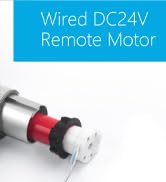
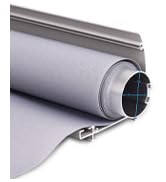
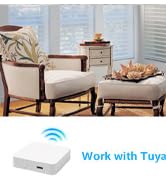
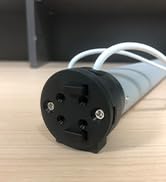
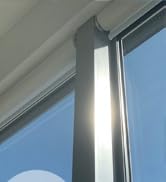
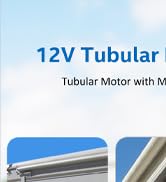
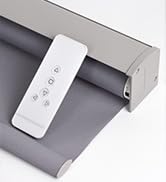
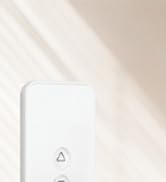
The Rollerhouse Roller Shade Motor is a compact, battery-powered motor designed for 1-inch (25mm) roller shade tubes. It offers wireless control via IR+RF remote and integrates seamlessly with Alexa and Home Assistant. Supporting shades up to 4.4 lbs, it features quiet operation, easy DIY installation, and customizable limit settings, making it the perfect upgrade for modern smart homes seeking cordless convenience and precise shade management.


| ASIN | B07CGHC2GB |
| Additional Features | 1 inch mini blinds motor, Convert roller shades to motorized, Easy to set up with Home Assistant and Alexa with our Wifi IR+RF Remote Control |
| Best Sellers Rank | #248,137 in Home & Kitchen ( See Top 100 in Home & Kitchen ) #1,449 in Window Treatment Hardware |
| Brand | Rollerhouse |
| Brand Name | Rollerhouse |
| Closure Type | Motorized |
| Color | Red |
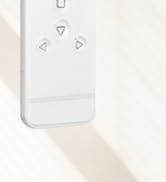
| Control Type | Remote |
| Customer Reviews | 4.2 out of 5 stars 419 Reviews |
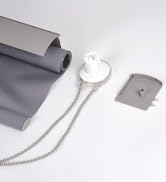
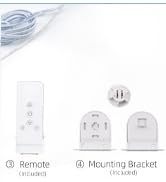
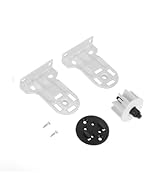
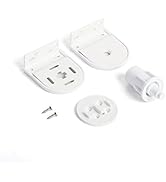
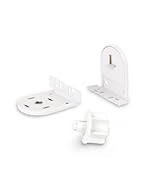
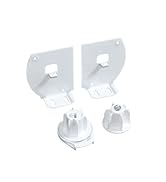
| Included Components | 25mm shade bracket, 25mm/28mm rubber fittings, 8.4V plug charger, Remote, Roller shade motor |
| Item Dimensions L x W | 21"L x 78"W |
| Item Height | 0.03 centimeters |
| Item Weight | 1.25 Pounds |
| Manufacturer | Rollerhouse |
| Material | Metal, Plastic |
| Material Type | Metal, Plastic |
| Model Number | 612289935760 |
| Mounting Type | Inside Mount,Outside Mount |
| Number of Items | 5 |
| Opacity | Blackout |
| Operation Mode | Automatic |
| Pattern | Solid |
| Product Care Instructions | Spot Clean Only |
| Product Dimensions | 21"L x 78"W |
| Recommended Uses For Product | Indoor |
| Room Type | Bedroom, Living Room |
| Shape | Rectangular |
| Size | Compatible for 1in,(25mm) OD shade tube |
| Specific Uses For Product | Home Décor |
| UPC | 612289935760 |
| Water Resistance Level | Not Water Resistant |
J**O
Easy Install. Great Find
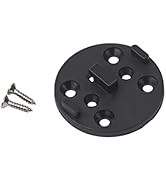
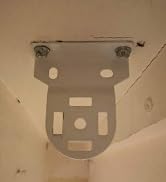
I was a bit apprehensive buying this given the varying degrees of difficulty people had reported. My experience was surprisingly simple. I was ready for cutting, grinding, and fabricated yet didn’t need to do any of that — the motor fit perfectly inside my tube, and the extra bracket assembly kit had an end plate fit perfectly on my existing brackets. I was able to take down my roller blind, insert the motor pulse end plate, and had it reinstalled in ten minutes. Here’s what I did 1. Carefully measured my tube. It was 38mm 2. Confirmed with seller the right motor to buy given my tube diameter and the metal tabs on the tube 3. Bought the motor kit AND the mounting accessory kit. The accessory kit was mandatory for me to have the right end cap that would work with my existing brackets. 4. Charged the motor battery 5. Removed metal valence and popped out my roller blind. One end of my blind is a push pin and the other was the chain drive 6. I pulled the chain drive out of the tube. Took a little force but it popped out 7. I inserted the motor into the tube, rotating the motor so the rubber piece on the end aligned with my tabs on the tube. The motor slid in 8. I made sure the charge port was facing down for easy access 9. I found the end cap in the accessory kit. The black end cap whichworked with my existing brackets. 10. I screwed the end cap in with the two screws. Many said the screws were too long. I didn’t find that to be the case 11. I put the roller blind back into the brackets. The push pin allowed me to get the blind into the space while i worked on getting the end cap hooked onto my bracket. 12, I tucked the antenna wire around back of the blind so it didn’t get clipped by the valence. 13. Made sure the power port and remot program were facing down where I could access them 14. I pressed the program button on the motor. It jogged twice. and then the c button on the remote. Roller and remote were now paired. And I could raise and lower 15. I realized the motor direction was going the wrong way with remote. Pressing up caused roller to go down. Followed the instruction to reverse the motor direction. I held the limit button and stop button which reversed direction. Now remote worked correctly 16. Programmed upper and lower limits per the directions 17. Everything working flawlessly My test case worked and I ordered six more. Will update when done with the project. But so far…a big success and huge improvement to having the chain drive for so many rollers Edit: I ordered six additional motors and installed each. I did not run into any problems. Followed the sequence from above and all seven motors are programmed and working I also purchased the 15 channel remote and linked each motor to the single remote. I can now control all seven from one remote with each window being on its own channel Next I purchased a BroadLink rm4 pro to connect the motors to an iPhone. I configured the BroadLink and added each shade to my hub. Bin each case, I went through the process of having the BroadLink learn the remote codes. And ultimately programmed open, close, and stop buttons. Now I can control each motor with my iPhone through BroadLink. I subsequently linked groups of shades to a BroadLink scene allowing me to control multiple windows at once. Even cooler was BroadLink allowing me to pair with Siri. Now I can say open living room shades and a block of four shades opens. Couldn’t be happier with the outcome. Have another five kitchen windows that I would like to automate in my next round. And my project will be complete.
M**K
Works on Smith and Noble Roller Shades
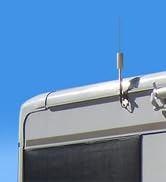
TL;DR: I don't regret the purchase. It works like a charm. You'll just have to struggle with the creatively-worded instructions. I wanted to motorize two Smith and Noble roller shades (each about five feet wide and four feet tall), but I only bought one Rollerhouse (AKA Rollerhouses) motor assembly to try out. It works beautifully, and I just ordered a second one. It took me over an hour to figure out the charming pidgin-English instructions and to manhandle my existing shade to remove both ends of the tube (without completely ruining the shade material). I suspect the second one will only take me about 20 minutes to install. To determine the correct size before ordering, I removed the chain end from one roller shade tube. I measured the tube diameter, but I also noticed that Smith and Noble prints the size on the end piece. Mine said "25mm," so that's what I ordered. When I first tried to put the motor tube inside my shade tube, it wouldn't fit, and I thought I'd ordered the wrong size. But it turned out that the company had pre-fitted it with adapters for a larger tube. They provide the correct "crown and drive adapters" needed, and it only took me another 15 minutes to figure out how to get the larger ones off! The instructions for setting up the remote are clear, but the diagram does not quite match the remote they sent. In order to both pair the remote with the motor and set bottom and upper limits, you'll need to remove the remote's battery cover and access two small buttons found inside, marked C (for confirm) and L (for limit). One review suggested a battery was not included, but mine had a new CR2450 in the box. What is NOT included are the four screws that will attach the brackets. So don't throw your existing ones away! The recharging cord looks very short in some of the promotional illustrations, but it's actually about five feet long. In any case, it's very easy to just remove the shade if you need to move it near a power outlet when it needs recharging. The instructions say that it takes 5-6 hours to charge. It seems to have been mostly charged before going into the box, so you won't need to wait half a day before installing it. The limit settings work well, so, after pressing the up or down arrows on the remote once, it will stop exactly where you want it to. It's perfectly fast enough for me. And it's pretty quiet. Cat Owners Alert: The motor end-piece has a four-inch-long wire antenna that protrudes horizontally and is semi-visible when the shade is open. That means cats will spot it immediately and try to play with it (just prior to destroying it and making your Rollerhouse--AKA Rollerhouses--useless). My temporary solution was to use some painter's tape to attach the wire to the wall. So far, the cats are none the wiser. But we'll see. They're pretty clever.
R**W
Success, Finally! Definitely a DIY project requiring patience.
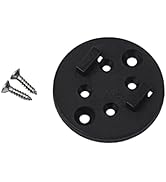
After researching products on line and reading customer reviews and Q&As I finally purchased this Rollerhouse 22 mm motor kit. I am motorizing existing Bali blinds. All these manual blinds use 30 mm internal diameter aluminum roller tubes. The current manual beaded chain mechanism of good quality, (brand: RollEase). The motorization kit did not include any mounting brackets. I could not find a bracket suitable to fasten the motor end of the roller tube in spite of time consuming online and store searches. Rollerhouse recommended a mounting kit, which I ordered. The product I received did not match the quality of the existing brackets. Besides the mounting kit did not come with any screws to fasten the provided disc (with 4 holes) to the motor. The motor has two small holes which align with two of the four holes on the disc. The seller suggested that I use the two screws that came with the motor kit to mount the disc to the motor. These screws were provided to mount the remote control to the wall. After back and forth emails voicing my concern about damaging the motor end I finally tried these two screws. Unfortunately these 3/4 inch long screws went straight into the clutch on the motor tube, pretty much disabling its function! After spending more time wandering around Lowes and Homedepot I bought two 5/8 inch Phillips screws. I trimmed them to shorten them to just under 1/2 inch! My blinds are inside mounted and so there is no room for any adjustment. The motor added about 1/2 inch to the total length. So I had to use a hacksaw to trim off about 1/2 inch of the metal roller tube. I successfully motorized one 22 inch wide Bali blind. I plan on motorize the remaining 3 blinds in the coming days. My hope is that I may stumble on some mounting bracket which can be used with less hassle. Lessons learned: 1. This is truly a DYI project. Unless you have a lot of time and patience get some one else to do this.. 2. Do not fully trust the suggestion from the seller. The one making the suggestion may not have sufficient familiarity with the product you are dealing with. 3. I am surprised that there are no readily available mounting brackets for what appears to be a popular item for motorization of blinds. 4. There are no adequate instructions. The included ones appear to be written by some one with limited language skills. To me the reviews and answers in Amazon were more helpful. That is one reason I am adding this one. Good luck fellows!! Update 2-23-18 The seller finally seems to have understood what I was trying to convey. The only option I found so far to attach the motor end of the roller tube to a wall bracket (inside mount) was to use the kit sold separately by the same seller. Unlike other items with appropriate mounting brackets they sell through Amazon they have not been able to put together similar package for the 22 mm roller tube for use with 30 mm (ID) tubes. However I am happy with their product. Besides I could not find anything similar (with rechargeable batteries) during my search. I have ordered two more motor kits for the remaining (similar) manual shades. Wish me good luck!! Last update 3-4-19: Finally all the four blinds have been successfully motorized. I hit a minor snag with the remote while setting the limits. This required a few trials to get done. A note about the C and L reset buttons: These are not buttons but small holes on the back of the remote, similar to most reset openings in routers etc. . There appears too be a plastic film covering the holes, which gets disrupted on pressing with a paperclip or ball point. I think this does not affect their operation. Regarding the lack of mounting brackets etc., the seller sent me an email to the effect that they may be condsidering this in future product listings. I think it will be helpful to prospective buyers. I hope this will be my final comment on this product unless something goes bad in the immediate future! Dec 2019 update: One more update after 10 months! The motorized blinds are still working. Does not need charging as frequently as I expected. Feb 26 2021: I wanted to ask a question to the seller. I could not find a link or an option to ask a question. Hence this post here: I see that my review shows up in your product web page on Amazon. My question: Since your product has worked well for me for the past couple of years I am considering your product also to automate some rollers hades. Can you please provide me with some way to contact you to see if I could consider your product for my next projects? Thanks R Warrier 2-26-21 PS: I had to put a star to this post and so I chose 4 star.
F**.
Worked perfectly with my 7-year-old shade role up system.
The roller motor worked perfectly with my existing system. It was fairly easy to set up and runs smoothly.
A**R
Quality Product and Great Customer Service
I purchased one of these motors to test out as possible solution for several roller shades in our home. I have Rollease brand shades with light filtering fabric. I measured my existing interior shade tube at 35mm with a smooth interior. My shade was 70" wide and 84" tall (my largest shade). The motor is plenty strong to raise and lower the shade and is quiet - quieter than I expected - speed is good, not too fast and not too slow. The only modification I needed to make for my mount was to grind/cut down the mount bracket flat tab that inserts into the motor. If you don't have a way to do that, you could probably find and purchase a replacement bracket since the end is standard slotted - you just need to find the right size. It does have a couple different slots for different sizes, mine was too big. Installation was easy, take down shade which is a flip tab and lift out for mine and then pry out the old chain end clutch and slide insert the motor and rehang shade. Exact shade height doesn't matter as you are rehanging as you will set the top and bottom when setting the remote limits. The motor came with two additional grommets for slightly smaller/large tubes. I swapped to one of the other grommets that was a hair smaller that fit better for my shade. I removed a little retainer clip, swapped ends and reinstalled the clip - it might be a little tricky as the clip is small, a small regular screwdriver worked for me. I paired the remote prior to rehanging since it was easier to press the pair button when on the ground rather than when hanging up. I also charged the motor prior to starting installation so I was starting with a fresh full charge. Setting the top, bottom, and mid limit was very easy - you just need a paperclip to press the small set button on the remote. My complete install with remote programming and bracket modification was less than 30 mins and my next ones will be even quicker now that I have done it once. Depending on your specific shade, it could be plug and play for you or you might need some basic DIY skills. If it weren't for the bracket on mine, I probably could have done the install with no tools or maybe just a screwdriver. My original shipment didn't come with the remote as pictured but the seller was super responsive and shipped one out right away. They have also followed up several times to check in and make sure everything was ok - top notch customer service! Overall a great product and great seller. Worth the money spent and I will be purchasing several more based on this experience. Once I have everything setup, I won't have to pull shade chains on all my blinds twice a day, I can't wait!
B**.
Require to buy a wifi hub
This is not smart. You will need to buy a wifi RF hub to add it to your home automation.
K**N
Great product! One of my favorite purchases.
Bought 4 of these 3 years ago and they all still work great! They’re used daily and needs a charge once in 2-3 months. I just bought a 5th and synced it to the same remote seemlessly with install in 10 minutes. Overall extremely happy with this purchase! Will definitely purchase again. Great value for money, good fit and durability. Ease of use and noise level is acceptable.
C**L
Works but it takes a lot to do it
The motors work well. But to get to the point of having them work is another story. Yes, seller writes that mounting brackets are not included. Why not make the bracket hole a bid wider so it fits the most common brackets? Or at least indicate where to purchase them? I could not find any bracket that would fit the size of the hole of the motor. I ended up cutting the one I had manually so it would fit. From what I read in comments, that's a very common issue, so seller could try to help clients a bit more. As for Google Assistant integration, it's very misleading. They only mention that you can link with Broadlink app. They dont' say in the details that you need to buy a separate Broaklink Hub costing 45.00. Also, instructions are horribly written, had to guess my way to set them up. Just horrible English. You are selling a usd100 product. Why not pay some English speaker to write decent manuals and instructions, so your clients are happier and get better reviews?
Trustpilot
2 months ago
1 week ago