We remain fully operational. Our teams are working around the clock to ensure your deliveries continue safely.

DOWNLOAD THE APP


Customer Services
Copyright © 2025 Desertcart Holdings Limited
DOWNLOAD THE APP

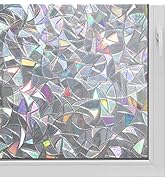
🪟 Reflect your style, block the heat, own your privacy.
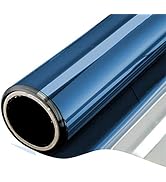
WPCTEV One Way Mirror Window Film offers advanced heat insulation by blocking 85% of infrared and 97% of UV rays, reducing glare and protecting interiors. Its 6 mil thick static cling vinyl installs easily without adhesive, providing daytime privacy with a sleek black-silver mirror finish. Durable and scratch-resistant, this eco-friendly film fits various home and office windows, cutting energy costs while enhancing aesthetics.


| Best Sellers Rank | #4,114 in Home & Kitchen ( See Top 100 in Home & Kitchen ) #21 in Window Films |
| Brand | WPCTEV |
| Color | Black Silver |
| Customer Reviews | 4.0 out of 5 stars 26,635 Reviews |
| Installation Type | Static Cling |
| Material | Polyvinyl Chloride (PVC) |
| Product Dimensions | 30"L x 500"W |
| Size | 17.5 Inch x 6.5 Feet |
W**Y
I did 10 windows in my house, and I am happy with the outcome
I have ten windows, and one of my neighbors is a bit nutty, so the privacy was the first concern. We also have a small 1935 house that heats up like crazy when it's sunny, so heat reduction was also a concern. When I started, I bought the gold silver, the blue silver, and the silver. The silver worked out best. I ended up ripping out the blue and gold. The gold was the worst for us. Gold translated into looking like a sepia tone fire watch. The sunlight had the same quality as the smoggy forest fire when smoke was everywhere. We replaced that with silver. The blue was better, but darker, and not great for the kitchen. it made the food blue tinted. So we ripped that out in favor of silver. The silver was only mildly visible, like a very lightly tinted set of sunglasses, and didn't do anything weird. It was the best option. Some things I learned. The color is only visible from the inside. It effects the color of the light coming in. The adhesive side is not remotely adhesive to the touch. I pealed the backing off the first one and thought I had done it wrong, but trust the process. It will work. Order more than you think, because you need a few extra inches on all sides for install. It's far easier to cut it a few inches larger and have more to slide the film on the glass if need be. Watch some YouTube videos on how to install. It can be tricky to get installed without bubbles. Buy an install kit with one of those fuzzy velvet squeegees. You'll also need some sort of metal flat thing, like a dough knife or putty spatula, to run the exacto blade across the edges. Don't skimp on exacto blades. I ended up using a fresh one for every single window, and it really helped. You can carefully peel back the film if you find some grit under it, but be super careful. That way lies madness. Be prepared that perfection is not gonna happen. I got mine 95% perfect. I have animals so there is an occasional pet hair or wife hair. I had one window with a weird latch that was super hard to cut around. However, 95% is good enough, and nobody can notice unless they are up there looking for errors. You literally cannot see in my home from right in front during daylight hours withe the curtains open, and certainly not from across the street where my nutty neighbors sell whatever it is they sell 24/7. The film also works really well with repelling heat form the sun. It made an enormous difference. Because of this I put some on my clouded glass windows in the bathroom, and it really really worked. I was shocked at how much it reduces heat. The cat is not thrilled by this, but the rest of us are. We are very happy. After the first couple windows we got into a groove, and it was pretty easy to put them up. I got better at it the more I did, so I don't begrudge doing the gold silver and blue silver first, then ripping them out. They were great practice windows, and helped me learn the process. It is very skill based, so there is a learning curve. Good luck!
A**R
Least annoying film to apply, significant heat blocking
DISCLAIMER: I hate what Jeff Bezos is doing to the safety & well-being of his workers and if I lived anywhere with physical stores that stocked supplies like this I’d be thrilled to put money ANYWHERE else. But for those of us in rural areas who need to know about a low-cost product to keep energy costs low, here you go. AFFECT ON TEMP: My kitchen windows are single-pane non-UV glass and it reaches 120°F at the worst point in summers. I’ve applied several window film types in the past elsewhere (anti-shatter, holographic, etc) and this film is by far the easiest to apply. The temperature difference in the kitchen feels like at least 8-10° after covering the windows. AFFECT ON VIEWS/LIGHT: I’m an artist and hyper-specific about color and would hate this if it threw a weird tone onto everything. I got the silver kind, and while it does block a ton of heat, it does not block too much light. There is a slight blue-ish tone to the sunlight compared to before, but it’s calming and doesn’t look fake or fluorescent-like. APPLICATION: 1) Clean your windows multiple times with both vinegar solution and 50/50 rubbing alcohol and water. Think lab-level clean. It really helps. 2) To apply large pieces, use two people. The only annoying thing about this material is that you can crease or put half-moon shape dents in it when unrolling, so it really helps to have a partner or buy extra. Cut to about an inch large on each side but not more. 3) You can use 2 pieces of painters tape on top to hold the piece on, and then peel the inside film off with the window film hanging in position. 4) spray on a lot of barely-soapy water to both the inside of the film AND the window (like half a squirt/tsp of soap in an entire spray bottle) 5) use a rubber squeegee (not included) or a plastic ruler with the edge covered in painters tape to prevent scratching (like I did) to squeegee out bubbles from top to bottom and outwards from the middle towards each side. Pro tip: bumpy terrible windows like my multiple paned ones will likely have remaining bubbles on the sides and that is the fault of the glass, not the film. It’s fine. Perfection is an impossible goal. As for the nice window on the door, that one came out pretty close. One or two tiny half moon dents. Highly recommend, sadly even with the consequences of supporting this late-stage-capitalism death-eater in the process.
E**S
Silver/Silver - Easy install with right tools. A little foggy
Bought this as it is advertised to keep 85% of UB rays out. As someone who lives in the desert but also enjoys keeping my blinds open this was a no brainer purchase. Shopped around for a while and landed on this one. I purchased the silver/silver option. In the larger sizes rolls. I ended up installing on my back glass sliding doors and my side windows. Glass doors - 90 x 27 - x2 Side windows - 56 x 24 - x2 Installation is fairly easy. With the size of my windows I did have an extra hand. As it could be difficult to peel off the backing while trying to apply. After spraying the windows with soapy water and placing it where I wanted it I set it on. I used a blade I bought in a film installation kit on Amazon for like 8$ and it worked like a charm. I would definitely recommend a new blade and a squeegee. The other tool that was a huge help was a ruler. Especially when you are cutting corners and edges. After my cuts and trying my best to perfect it. I. Worked the bubbles out of the film. Occasionally removing the film, respecting the window and re-applying. The bubbles came out fairly easy. Although no matter how much I worked it out there were tiny bubbles that still remain. Please BECAREFUL. This film does scratch easily. I used a squeegee with felt and still managed to scratch parts of it. I have read from a few others that they went away after a while. So if it doesn’t I’ll come back and update my review. The color of the film is silver/silver. I would say it’s pretty close to a one way mirror but you can still see inside if you are close enough. I would say from 5-10 feet away you probably get a 5-10% visibility rate in the middle of the day. If your at the window you can probably see 15-20% of the inside (depending on lighting and time of day). The color of the film has a bit of a tint or very very slight fog from the outside. I don’t know if that’s temporary and will go away. Pros - Easy to Apply Keeps the heat and sun out. But does not block light entirely Value for the price Privacy factor Cons - Slight fog Easily scratches when applying - BECAREFUL when working out bubbles. Creases easily For the price and the amount I received I would recommend it. This is not a paid review. I will be sure to update my review if quality drops off or if it exceeds my expectations.
E**H
Its an art to install it
I just completed installing this on the inside (I chose the Blue color) of my lean-to greenhouse. It has changed the interior temp from 110* + to 80-85* so it did what I needed. There were no other changes, the building already had adequate venting both low and high it was just the Sun. The lean-to was unusable in the warmer months ( SW Ohio ) due to the concentration of the solary rays in it during the day. The siding was actually starting to warp on my home! Now I have a nice area to relax in, the house plants can be managed out there, which they like, and the heat is no longer an issue. The material I put it on was Polycarbonate - I know they say NOT for Polycarbonate, but since it did not have adhesive was just static cling, and I had used other cling type material on the dual-walled structure, I felt it was safe to use. To my surprise, the long straight up and down windows were the easiest, anything on an angle is difficult to initially apply the film, then squeegee the bubbles out. On the angle panes, I used a little bit of E3000 spray glue, a water based adhesive that quickly dried clear in the intense heat and adhered the corners. I was having an issue with them peeling at the corners. A couple of tips: Measure and cut your length beforehand, so you aren't struggling with a roll. DO NOT STRETCH this film in any way - doing so creates bubbles and wrinkles which are difficult to resolve. Try to tuck the edges in behind something during installation, that ensures a smooth adhesion on the edges. Use copious amounts of water in a spray bottle with a couple drops liquid soap to get a good slide going for positioning. Things I like about this: UV and Infared radiation is cut 75% by this film in my application, you can literally feel the difference as you apply it. Provides a good amount of light blocking, so plan for that in whatever room you install it in. Things I don't like about this film: Hard to work with larger pieces (> 24") and requires careful initial positioning so as to avoid creasing the silver side of the film. Once creased, you can't get that out again no matter how much you try. Price? Fair for the product, as it is thick and seems like its made well. Time will tell on durability and adhesion on the Polycarbonate.
O**L
Can't recommend this product
Let me start by saying maybe it's me. Or not. My key beefs: * The - very limited - instructions that come with the product make it look dead easy. Don't believe it. * I assume the instructions were a direct translation from Chinese, so they didn't always make sense to me. Not a racist comment: just a fact of life. My wife is Chinese and our kids half Chinese. * No manufacturer's website that I could find. Clips on YouTube provided more info than the manufacturer. * Nowhere do they address any of the issues I detail below or give you any help on how to deal with them. The instructions tell you to clean the window - check. So far, so good. Then you're told to cut the film 10 mm *wider* than the window, but nothing about the length. I'm assuming they meant the length. Lost in translation? Trying to cut the width of the film would make the rest of this a complete nightmare. Next peel the - very thin - protective film covering the actual window film. Okay. Nothing too challenging so far. Now is where it starts to get tricky. "tricky" isn't the right word, but I'm not sure what is. You're told to spray the window with water and then spray the "adhesive" side of the film with water as well. Assuming the window in question is vertical, the water immediately starts running down the glass. Basic high school physics here. Then you're supposed to spray water on the adhesive side of the film as well, but the film rolls itself back into the shape it came in - rolled around a cardboard tube. I don't know how you can possibly spray water onto the film unless you have several people helping you hold the corners down. The drawing on the instruction shows one person apparently "hanging" - that's what it looks like - the film onto the window as if it were a piece of cloth or paper. Which it isn't, and it wants to roll itself back onto its carboard tube. So while you're trying to position it onto the window, it's trying to curl up back into a roll. Eventually I had my wife help me and after several tries we managed to get it positioned more or less correctly. "less" being the operative keyword here. Then you're supposed to put the original protective film back on the actual film, now on the window, so you can push the few bubbles out. "few" on the illustration - your mileage may vary. After pushing as many of the bubbles out as possible, frequently lifting one of the corners to get the larger bubbles out, we have it on the window, albeit with several small "creases", I assume the result of me squeegeeing the bubbles out. Long story short, I didn't find this anything like easy. My recommendation: know what you're getting yourself into, make sure there are 2 of you as you'll need more than your own hands. Read the directions and get everything laid out in advance. Be patient - I'm not, which doesn't help. Actually - hire a professional and watch TV while they struggle. HTH.
K**T
It works but finicky to cut/trim.
Purchased the blue. The view is fine with that color. It does work to reduce the sunlight (I’m sure the black shade would be more effective). The rooms are not too dark. For the price, it’s effective and did seem to reduce the heat absorbed by the afternoon sun and thus helped reduce the cooling costs. Easy enough to hang, but to trim…no. New straight razor, new angled razor, surgical scissors all failed. It cuts ok, but catches so it’s not a clean edge. The second roll didn’t have a right angle was off by an inch or so thus requiring more trimming. The right angle edge was helpful. Learned a couple things-use soapy water mist, not liberally or you just cause more work. Trim to fit, not extra as the directions said. Make a template to cut. After hanging, smooth out some large bubbles, but let dry overnight and then work out the few remaining, otherwise you waste time and the film moves. Amended-ended up ordering the black for garage windows. Not much darker than the blue. Blue definitely provides for a better view. Both definitely block vision from outside during the sunlight hours. After 4 rolls, my biggest complaint is that the film is not all cut evenly, so without a straight edge/angle you have to measure and trim even more. Last roll had a flaw in the film half way through, disappointing after the work to hang the tint. Edit: claims to be reusable and technically it is. But after a summer of direct sun when the film was taken down, its stiffer. Found it best to roll to store. And liable for the window it was used in. Still very stiff when you try to reuse and even with a soapy mist it’s not as self-adhesive as first use and rolled up at the edge. Some bubbles can’t be removed as the stiffness prohibits it from laying flat on the second use. Not a deal breaker.
I**T
Second time is a charm - template recommended - Mesmerizing results
Thick mil. That means difficult to cut. I bought the first roll and ruined it trying to cut it in place. I made some templates then purchased a second roll. The new installation looks marvelous and it wasn't too difficult either. The key is definately have an accurate template that you can use to cut the film to exact dimensions; including rounded corners. The way the natural light comes through and produces a rainbow of colors if magnificent! The finished product is awesome and it works like a window cling with the ability to remove it and reapply it. The film is a little difficult to work with but with patience and preserverance the determined will find that this purchase is a good value and even adds a little privacy to your set.
N**R
Attention all DIY-ers
I was pretty skeptical about this window film at first, but after applying to our kitchen windows- I am definitely liking it. I ordered these as a temporary fix to help cut down on the amount of heat coming in through our windows until we are able to replace the windows in our house- it needs a lot of updating. Let me preface this by saying that our home is VERY well insulated BUT it is around 40ish years old- it’s only inhabitants prior to my husband and I buying it in January this year was the man that built the home, his wife, and their children (2?). The AC unit is keeping up well, but it is also old and in south east Texas- it never gets a break. I keep the ac set on about 67° between the end of March until around the end of October to middle of November. Don’t come for me unless you live anywhere around Houston or south of Houston- cause you know how it is. The inspector we used prior to purchasing the home stated that the house was in great shape and there were no issues specifically with the ac and the house staying cool- but I want to ensure we can save every penny we can off the entergy bill and help our ac unit live its best life for the remainder of its life lol. Now onto the product: Rolls come with directions on how to apply. We cut the film to the length of the window panes, removed the protective film from the mirrored side, sprayed a little water on the mirrored side of the film then applied the misted mirrored side of the film to the window. We lined up the top edge and the right side edge with the same edges of the window pane and then using a squeegee, we got rid of all the air bubbles we could find. Using an old ID card, (you can use any kind of card), we pressed in the left side edge while simultaneously using an exacto knife to cut the film to the edge of the pane. Once it was cut nicely, we repeated that step with the bottom edge. Our window panes are about 9.5x9.5 so I purchased the shortest width of this roll of film. It’s a pain to cut to size before applying to the window because it keeps wanting to curl up but once you remove the protective film from the mirrored side, it’s pretty malleable. I got three pictures of our window during this process. The sides and back of our home is pretty shaded but first was at about 7:05pm yesterday (9/13/24). We did half the window and finished up today at about 7:10pm. Didn’t take long- in total maybe 1.5hrs only because we had to cut each individual window pane. During the day, even later in the evening (7-7:15pm) you can barely see anything through this film from the outside. At night though- you’ll definitely want to close your curtains. All in all, my husband and I think it turned out great as a quick fix until we replace all of our windows. (I HATE our windows with a passion). The film looks great and the while the width of the rolls could have been a little bit shorter- it still worked out perfectly, just took a little more elbow grease. Will update once we have the rest of the windows done and see if we start to see a difference in the Entergy bill.
Trustpilot
2 weeks ago
1 month ago