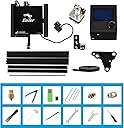
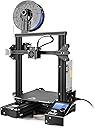
🚀 Elevate your 3D printing game with speed, precision, and effortless control!
The Creality Ender-3 V3 SE is a high-performance FDM 3D printer featuring a max print speed of 250mm/s and acceleration up to 2500mm/s². Its dual Z-axis and steel Y-axis linear rails provide exceptional stability and precision. Equipped with hands-free automatic bed leveling (CR Touch + strain sensor) and a PEI magnetic build plate heating up to 110°C, it supports versatile filaments including PLA, PETG, and TPU. The printer comes 96% pre-assembled for quick setup, offers silent operation, and integrates with the Creality Cloud APP for remote monitoring and advanced slicing features. Ideal for professionals and enthusiasts seeking fast, reliable, and precise 3D printing.


| ブランド | Creality |
| 商品の寸法 | 42奥行き x 36.6幅 x 49高さ cm |
| 商品の重量 | 7 キログラム |
| 対応デバイス | デスクトップパソコン, ノートパソコン |
| 材質 | アクリル |
| 色 | ブラック///ホワイト |
A**ー
非常に高いクオリティです。購入してよかったです。
価格に比べて非常にクオリティが高いので満足です。梱包も完璧で開封時に何の心配もありませんでした。組み立てに必要な工具はすべて同梱されていました。テスト印刷用のフィラーも少しだけ同梱されていてありがたいです。 microSDカード(説明書とスライスソフト、ドライバ入り)がUSBアダプタにセットされた状態で同梱されているので、同封されている紙の説明書ではなくまずはmicroSDの中のPDFの説明書を読みましょう。こちらに組み立ての詳細説明が日本語で書かれています。 組み立てと調整が少し必要なので初心者よりは中級者向けなのかもしれません。テーブルのレベル調整の方法は説明書に詳しく書かれています。上部で平らな台の上で作業すると組み立て精度が出しやすいです。ベースのフレームはモータドライバとテーブルのスライドが組み立てられた状態で梱包されていますが、足部分の部品をいったん緩めて平らな台の上で締めなおすと良いです。結束バンドが同梱されていますが、ケーブル類のどの部分をどうやって固定するかは書かれていないですが工夫して固定しました。 スライスソフト(日本語対応)の設定項目はとても細かく、上級者でも様々な材料のための条件出しの研究が十分できます。印刷時の騒音はとても小さいです。自分で調整した設定はすべて名前を付けて登録できるのでとても便利です。スライスソフトからはgcodeが出力されます。設定でフレーバが選べるので他のプリンタ用にも使えると思います。Ender3はMarlinフレーバのようです。ソフトからはプリンタを選択するだけで必要な情報(機械の寸法情報、gcodeヘッダフッタなど)がすべて自動で入力されます。完全にカスタム値を入力することもできるのでプリンタを改造したり自作したものにも対応できそうです。私はマイクロSDカードにgcodeを保存してプリンタ正面のmicroSDスロットに挿入して、カードから印刷しています。 ステッピングモータの動作も滑らかで速いです。標準設定でABS,PLAが問題なく印刷できました。TPUは少し調整が必要でしたが押し出し量120%に修正したら層間剥離なく密着されて良好な印刷ができました。印刷中にパネルでベッド・ホットエンド温度を変更できるのが便利です。
S**T
組立が少々難しいです
基本的にはマニュアル通りに組み立てればよいのですが、ケーブルなどの引き回しで試行錯誤する箇所があり少々悩みました。最終的には何度かやり直して組み立てることが出来ました。 もう一点困った点は、ステッピングモーターをステーに固定するブラケットが直角が出ていない事。 付属のブラケットを使用すると、Z軸のボールねじが鉛直にならずモーターに不要な負荷がかかり、最悪脱調してしまいました。ブラケットを若干加工し、直角を出すとスムーズに動作しました。 また、付属のSDカードの耐久性が悪いようなので、到着したら内容をPCなどにコピーしておくと良いと思います。 総合的には、安価でそこそこの精度でプリントできたので、満足です。
ユ**ア
使いやすいです
とてもしっかりした作りです。 設計したものが形になる様を眺めるのがとても楽しいです。
A**R
Great kit plagued by awful QC
Pros: Great quality prints for such a cheap kit Once properly calibrated, possible to get print quality that matches more expensive printers Not too difficult to assemble The space it uses on the desk is very minimal, making it easy to add to an office room Compatible with a lot of different filaments: PLA, ABS, Vinyl, etc Cons: The heat bed is terribly unbalanced making it extremely difficult to level. Even at the tallest setting, the front left corner was 3-4 mm below the extruder. No problem, just raise the Z-axis limit switch right? Wrong. The rear left was 1-2 mm ABOVE the bottom of the extruder on its lowest setting. Meaning I'm either cooking on the rear left or unsettling on the front left. I've spent hours trying to calibrate the leveling and ultimately I might have to either return the printer or take it apart by hand to see if I can level the heat plate. Out of the box, this printer isn't really "complete". The BuildTak includes clips that constantly bump the extruder even if you place them at the edge. Why are they included? The extruder makes a terrible screeching noise when the clips get caught. You'll want to upgrade the BuildTak to tempered glass ASAP, but the tempered glass kit made by Creality (same maker) doesn't include upgraded clips, and it's too thick for the stock clips, so you'll have to buy silicone thermal pads. The included instructions are awful. You'll have to look at Youtube to figure out how to assemble, and they changed the Z-axis limit switch so none of the videos are current. The stock fans are loud... If they went up to at least 80mm fans, which are actually cheaper, they could've gotten the same air pressure with reduced noise. The stock extruder constantly leaks out filament. Even doing a simple level test/bed leveling you'll have filament rubbing everywhere like it's a pen. Overall, I'm happy with it, sort of, but I feel like I've spent a week just trying to get it to where I can print and the quality will be good. It's bang for buck but don't let the price fool you, you'll spend $50-$75 getting it to a good point and you'll spend 6-7 hours calibrating and adjusting it. How much is your time worth? Overall, I'm disappointed and I wish reviewers would've highlighted just how much this printer will fight you to give you good prints.
D**L
機械をイジるのが好きな人向け
とにかく安い。 ただし使っているうちにドンドンアップグレードしたくなる。 3Dプリンターはとにかく自分で試行錯誤することを楽しめる人向けです。 ボタン一つではい完成にはなりません。 組み立ては素人でもできますがそこからまた最適なセッティングを煮詰めていく必要があります。
ク**ズ
印刷出来ない
テストプリントもズレて印刷出来ない 造形物は剥がれて動いたわけではない 組み立てた後の動作不良で返品できるかなー
K**I
良い製品ですが、自己解決を少々要する
有識者にお薦め頂いたので、本製品にしました。 このプリンタの前に、1万円台の安物3Dプリンタを購入しましたが、それと比べて圧倒的に綺麗に印刷できました。 全世界でユーザの多いプリンタのため、ネットに情報量が多いのも良いですね。 販売元からの回答が非常に早いのも満足です。(少々日本語には難がありますが。。。) 難点を挙げると、マニュアルなどに記載されている情報がアップデートされていない、分かりづらい、情報が分散している感はあります。 特に組み立て時にZ軸リミットスイッチの取り付けについて困りました。 スイッチをマニュアルの通り取付けようと思っても取り付けられませんでした。 結局、他の方の投稿のように、私もスイッチの突起を切り取りましたが、切り取らないで良いと説明しているページもあり、結局どうすべきかは分かりませんでした。 なんとなく正解を知らないと気持ち悪かったので、販売元に聞いてみましたが、印刷時にノズルから印刷ホットベッドまでの距離が0.1mm以内に制御できれば良いとの事なので、突起切るなりワッシャーを入れるなりなんなりして、とにかく印刷に支障がない程度に適切にリミッタが働けばOKという事のようですね。
H**H
オープン機ならではのデメリットを感じる
フィラメントは3巻き分くらい使っています。 レベリングなどを気を付けても、印刷物が反ってきて途中で失敗することが何回かあったのですが、 本体を段ボールで囲ってからは失敗は激減しました。
S**E
Excelente relación precio/calidad.
Excelente equipo. El ensamble es bastante intuitivo y con ayuda del manual lo llevas bien. Desde la primera impresión salió excelente.
P**M
A better 3D printer - even though the price is extremely affordable
I bought this printer as well as the Prusa Mini+. Surprisingly, this printer turns out to be easier to manage and comes up with better and nicer prints. The Prusa Mini+ had some initial teething problems - particularly pertaining to prints being dislodged as it was not sticking to the print plate. I used glue-stick and finally decided to use 90% IPA alcohol solutions, which eventually worked. During this time, the Creality became my most reliable 3D printer! This printer was certainly worth more than the price I had paid and I would recommend anyone who is interested in 3D printing to get one! I absolutely didn't regret making the jump - even though I heard horrible stories about support for this printer.
A**O
bom
bom
S**G
Ender 3: Best Bang for the Buck on Market Today!
I love this printer! I have a CR-10s and wanted to add another printer as I'll be selling parts and need to increase my print capacity. Overall, I'm more impressed with this little powerhouse than I am with my CR-10s though they use much of the same components and are built using very similar hardware. I'll outline the similarities and differences below. I print PLA and PLA+ from Hatchbox and eSun (200c and 210c respectively) but otherwise my Cura settings are the same for both (tweaked default Cura profiles). While it's nice to have the extra print volume, I prefer the Ender 3 and for the price I will probably be buying several more! Similarities include: frame parts and hardware (sizing differs), hot end, bowden tube, X and Y axis motor and drive belt. Differences: Smaller print volume (Ender 220x220x250; CR10 300x300x400) All-in-one design (doesn't have a 'ball-and-chain' control box like the CR-10 does) Single Z axis motor and rod (CR-10 has a dual Z motor/rod) Coated print bed (CR-10 comes with a glass bed) Large, easy to adjust bed leveling knobs (CR-10 has annoying small bed leveling knobs) Filament spool mount at the top of the frame (CR-10 mounted on control box) No color inserts, straight black frame *UPDATE: My hot end seems to have died after printing great for a couple days. I will be returning and re-ordering because I loved this little printer so much while it was working. Unfortunately, the hot end is permanently wired into the control box so a part swap wouldn't be easy. Re-ordering a new printer is the way to go on this one. It started as under-extrusion halfway through a print. Then I noticed the extruder gear would push filament and then snap back like there was resistance somewhere along the line. I ruled out the extruder gear by running the extruder without filament, it worked as expected. It would only do this when it tried to push filament through the nozzle. The next logical step was to clean it out in case there was a partial clog, unlikely since it was a brand new printer. All cleaned and still no luck. It actually seemed to be getting worse. The more I tried to trouble shoot, the less filament would come out of the hot end. Eventually, the hot end no longer reach a temp capable of melting the filament and I couldn't even hand feed filament through. The screen read 210c but the hot end was barely heated at all. Return processed, printer re-ordered. The assembly was a breeze and I'm sure I can get the new one printing in an hour or so now that I've gone through the assembly once already. I'll edit with another update soon... UPDATE 2: The new printer has been running like a gem for a few weeks now. I LOVE this little thing. I won't post a long-winded update. I'll just say that returning and re-ordering through Amazon was a breeze as always and in my opinion makes it work the extra money over some other lower-priced options outside of Amazon. That's all folks! Now I need to get back to printing!
H**D
Ótimo Produto!
Ótimo Produto. Recomendo olhar tutoriais antes para montar, mas no geral foi tranquilo. Nunca havia feito isso antes e deu super certo. As impressões possuem uma qualidade boa. Incrivelmente não tem quase nada a perder em relação a impressoras de maior valor. Não possui nivelamento automático, mas é tranquilo de nivela-la. A única dificuldade que tive foi com filamentos do tipo ABS mais baratos que descolavam com facilidade inviabilizando as impressões, mas isso é possível contornar com fixadores e/ou cola feitas para esse fim e configurações adequadas nos fatiadores. Dê preferência a PLA de qualidade que terá ótimos resultados. A impressora veio com ferramentas como alicate, chaves allen, desentupidor de bico e cartão SD. Além disso também veio um pouco de filamento, mas que não foi suficiente para imprimir o "gatinho da sorte" que vem dentro do cartão SD (ficou faltando a cabeça). Pelo valor, super compensa.
Trustpilot
1 day ago
1 month ago